How automatic car washes create swirl marks on your paint
Most vehicle owners use an automatic car wash at least occasionally. The convenience is obvious, and on the surface the car looks clean when it comes out. The problem is what you see when you park under direct sunlight. That web of fine circular scratches covering every panel, most visible on darker colors but present on all finishes, is called swirl marking. It is not cosmetic noise. It is mechanical damage to your clear coat, and it accumulates with every tunnel pass.
Understanding how this happens, and what it actually takes to fix it, matters if you care about how your paint looks long-term. It also matters before you invest in ceramic coating or paint protection film, because neither product can compensate for a finish that is already scratched. A coating locks in whatever surface condition exists underneath it.
This is one of the more common reasons vehicles arrive at EuroLuxe with paint that looks dull or hazy despite regular washing. The owners have been maintaining the car in good faith. The damage was introduced by the very process they were using to keep it clean.
What happens inside an automatic car wash
The core problem with brush-based and soft-cloth automatic washes is contamination. Those rotating brushes and cloth strips contact hundreds of vehicles per day. Grit, sand, brake dust, and road debris accumulate in the media and do not fully rinse out between cycles. When that contaminated material drags across your clear coat at speed, it cuts micro-scratches into the surface in circular or swirling patterns that follow the rotation of the equipment.
Even so-called touchless washes are not completely benign. High-pressure jets can drive fine particulate across the surface, and the chemical concentrations used to compensate for the lack of mechanical contact are often aggressive enough to degrade waxes, sealants, and lower-grade coatings over repeated exposure.
The damage from any single wash pass is usually too small to see in normal lighting. The issue is cumulative. After a year of regular automatic washing, the clear coat on a daily driver can show swirl marking visible in indirect light and deep scratching visible in direct sun. At that point, washing more carefully does not reverse what has already been done.
Why swirl marks are worse on some finishes
Not all clear coats behave the same way under abrasion. Softer clear coats, common on many European vehicles and some domestic models, scratch more easily but also respond better to machine polishing because they allow the abrasive to cut and refine the surface predictably. Harder clear coats resist initial scratching better but can be more difficult to correct once damaged.
Color plays a role in visibility, not in the depth of the damage. Black, dark blue, and deep red finishes show swirl marks starkly because the scratched areas scatter light differently than the surrounding clear coat, creating contrast. White and silver finishes carry the same mechanical damage but the low contrast between scratched and undamaged areas makes it less obvious. Owners of lighter-colored vehicles sometimes skip paint correction for this reason, which means they are coating over a compromised surface.
Pearl and tri-coat finishes add another variable. The metallic or mica flake layer beneath the clear coat can make swirl patterns appear as a diffuse haziness rather than distinct scratches, which changes how the correction work needs to be approached.
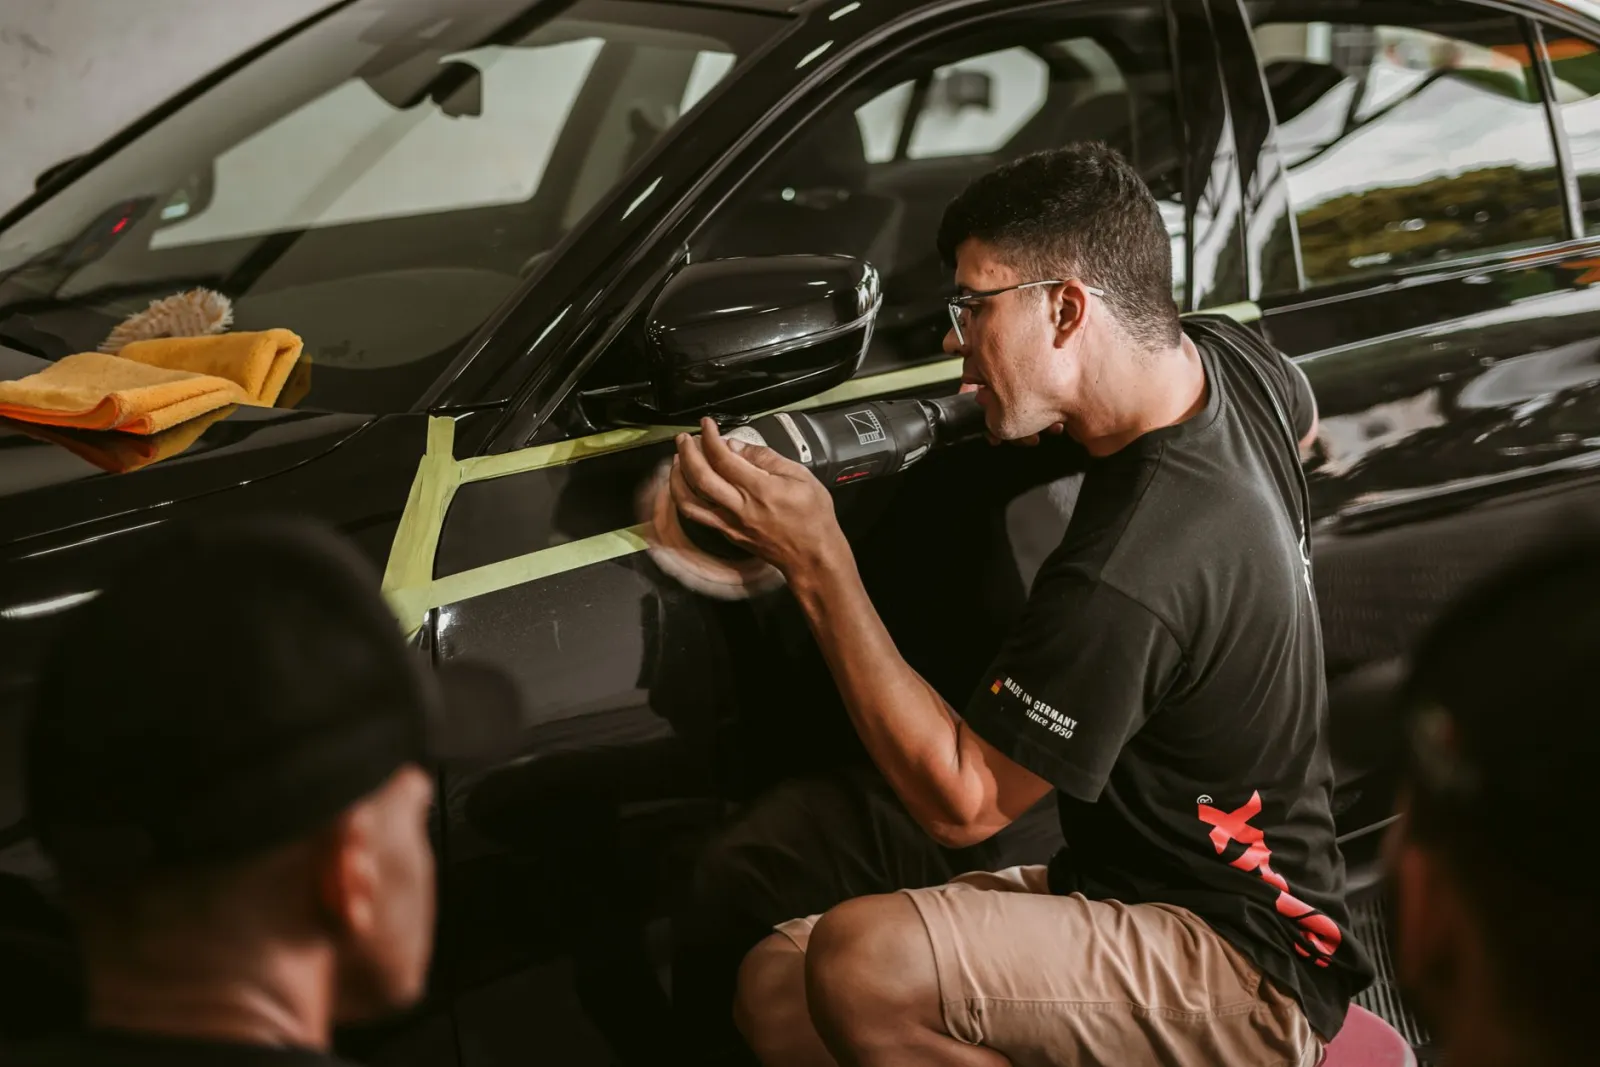
What paint correction actually does
Paint correction is the process of removing a controlled, thin layer of clear coat using machine polishing compounds and pads to level the surface down to the base of the scratches. The result is a uniform surface that reflects light consistently across the panel rather than scattering it from thousands of micro-scratch walls.
The process starts with a thorough decontamination of the paint surface to remove embedded iron fallout, tar, and surface contamination. Polishing into a contaminated surface introduces new damage during the correction itself. Paint thickness measurements are taken before work begins to establish a baseline and confirm there is sufficient clear coat remaining to work with safely.
From there, the compound and pad combination is selected based on the severity of the defects and the hardness of the clear coat. A single-stage correction using a finishing polish addresses light swirl marks and minor haze. A two-stage correction introduces a more aggressive cutting compound first to remove deeper scratches, followed by a finishing stage to refine the surface. The difference in result between a properly executed two-stage correction and a one-step polish is significant on a vehicle with accumulated automatic wash damage.
For a closer look at the full process and what to expect from a professional appointment, the paint correction service page covers the approach in more detail.
The relationship between correction and coating
This is the point most often misunderstood when owners are planning a protection package. A ceramic coating does not fill scratches or eliminate swirl marks. It bonds to the surface of the clear coat and enhances gloss, hardness, and hydrophobic behavior, but the optical quality of the finish underneath the coating is what you will see after the coating cures.
If you apply a high-gloss ceramic coating over a swirl-damaged surface, the coating amplifies the problem. The high reflectivity of the cured coating makes the scratched surface more visible, not less. This is why a proper correction sequence before ceramic coating installation is not optional on a vehicle with any measurable defect history.
The same logic applies before paint protection film installation, though with different consequences. PPF optically clarifies the surface beneath it due to its self-healing layer and film chemistry, but it does not eliminate existing scratches. On glossy PPF particularly, deep swirl marks can still read through the film in certain lighting. Correcting the paint before film installation ensures the substrate is as clean as possible before it is sealed under film that may stay on the vehicle for a decade.
Preventing new swirl marks after correction
Once a vehicle has been corrected and protected, the goal is to avoid reintroducing the damage. The primary rule is straightforward: avoid automatic brush washes entirely. Touchless washes are a lower-risk option for maintenance washing but should still be used selectively, not as a weekly routine.
A proper two-bucket hand wash using clean, grit-guarded buckets and dedicated microfiber wash media is the safest regular wash method for a corrected and coated vehicle. The technique matters as much as the equipment. Wiping panels in straight lines rather than circular motions, using light pressure, and rinsing the wash mitt between panels all reduce the risk of introducing scratches during the wash process.
For vehicles that cover significant highway miles in North Houston, regular decontamination washes to remove iron fallout and tar are worth scheduling before they build up to levels that require mechanical removal. Embedded contamination that is not addressed during washing becomes a source of surface damage the next time the paint is touched.
Evaluating your vehicle’s current condition
The most reliable way to assess swirl damage is to look at the paint under a focused halogen or LED light source at a low angle to the surface. Rotating the light or moving your viewing angle will reveal depth of scratch patterning that is not visible under diffuse garage lighting or in photos. What looks like a clean panel under fluorescents can show significant damage under direct sunlight or a detail light.
If you are unsure whether your vehicle needs correction before a coating or film installation, an in-person inspection is the appropriate starting point. There is no substitute for evaluating actual paint condition under proper lighting with a thickness gauge in hand. The answer to whether single-stage or multi-stage correction is warranted depends on what is actually present on that specific vehicle, not a general rule.
If you are in the Tomball, Cypress, Spring, The Woodlands, Conroe, or surrounding North Houston area and want a straightforward assessment of your paint condition and what correction would involve, reach out to EuroLuxe at (346) 893-5945 to schedule an evaluation.
Paint correction is not a cosmetic luxury on a vehicle that is heading toward a coating or film package. It is the foundation the protection is built on, and the condition of the surface at that stage will be visible in the finished result for years.